
Practice · Shade photo
How to take a shade photo your lab can use
The technician builds the crown by comparing your photo with their shade guide. Follow Clara's crown: which photo works, which ones don't, and how it reaches the lab with the Rx.
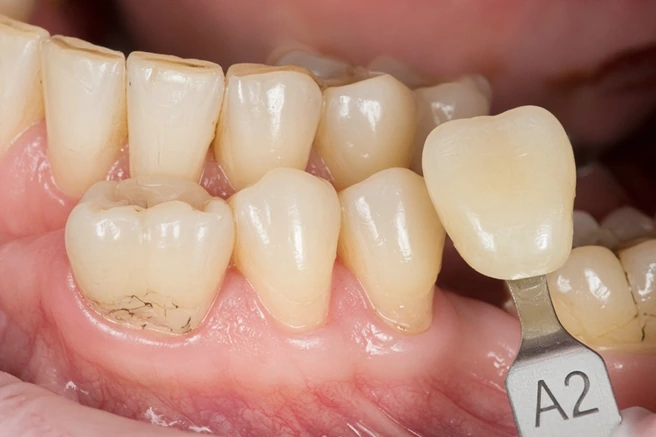
- 1The A2 label is readable.
- 2The guide sits next to the tooth, at its level.
- 3Wet teeth and neutral light.
Demo photo from Clara's case, from the desk's demo photo set.
The guide
Follow the photo to the lab.
Chairside · Before the prep
Take the photo with the guide beside it.
Dr. Herrera has chosen A2 for Clara's crown on 36. Before preparing the tooth, she holds the guide next to the neighboring teeth and takes the photo. Here is how the technician reads three different takes.
The technician sees the tab but can't tell which shade it is. Frame a little lower and take it again.
Under greenish light, the tooth and the guide change color and can no longer be compared. Take it again under neutral light.
The label is readable, the guide is level with the tooth and the teeth are still wet. This photo goes with the Rx.
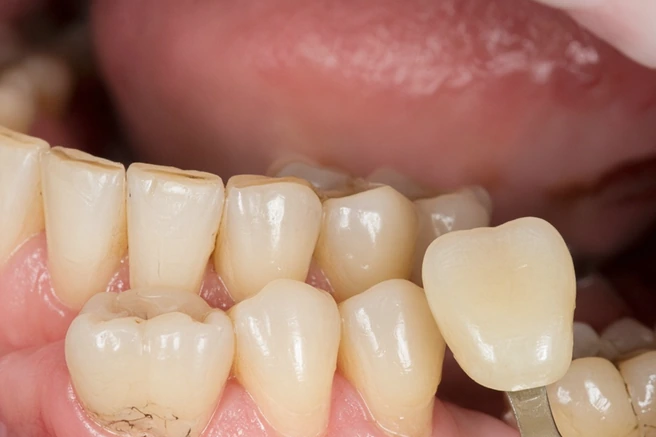
What the technician reads
- Guide
- Correct: Next to the tooth
- Label
- Fails: Out of the frame
- Light
- Correct: Neutral
DecisionAsk for another photo
The photo set
Send three photos, not one.
The photo with the guide gives the shade. With two more, the technician sees the tooth up close and the stump the crown will sit on.
The photo you just took, with a readable label and neutral light.
Move in on the neighboring tooth so the technician sees the luster, the edge and the texture.
After the prep, photograph the stump: with translucent materials, its color affects the crown's.
- 1Guide next to the tooth
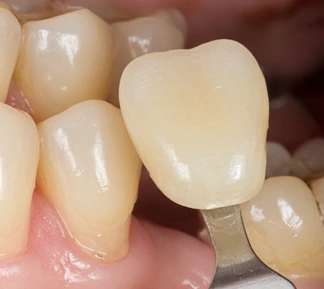 2Close-up
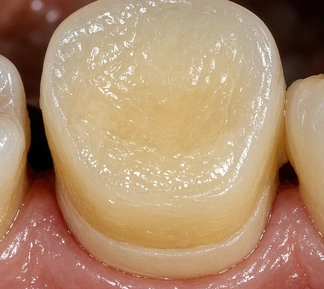 3Stump
The checklist
Your shade photo checklist.
Fill it in with the case or print it blank and keep it by the chair. Each box is something the technician needs to see.
Marked0
Blocks0/3
Pending 4
Pending is what you haven't checked yet before sending.
Uploading the photos to the case's Rx takes a practice account or a TrazaLink. Create an account
Practice · Digital Rx
Upload them with the Rx.
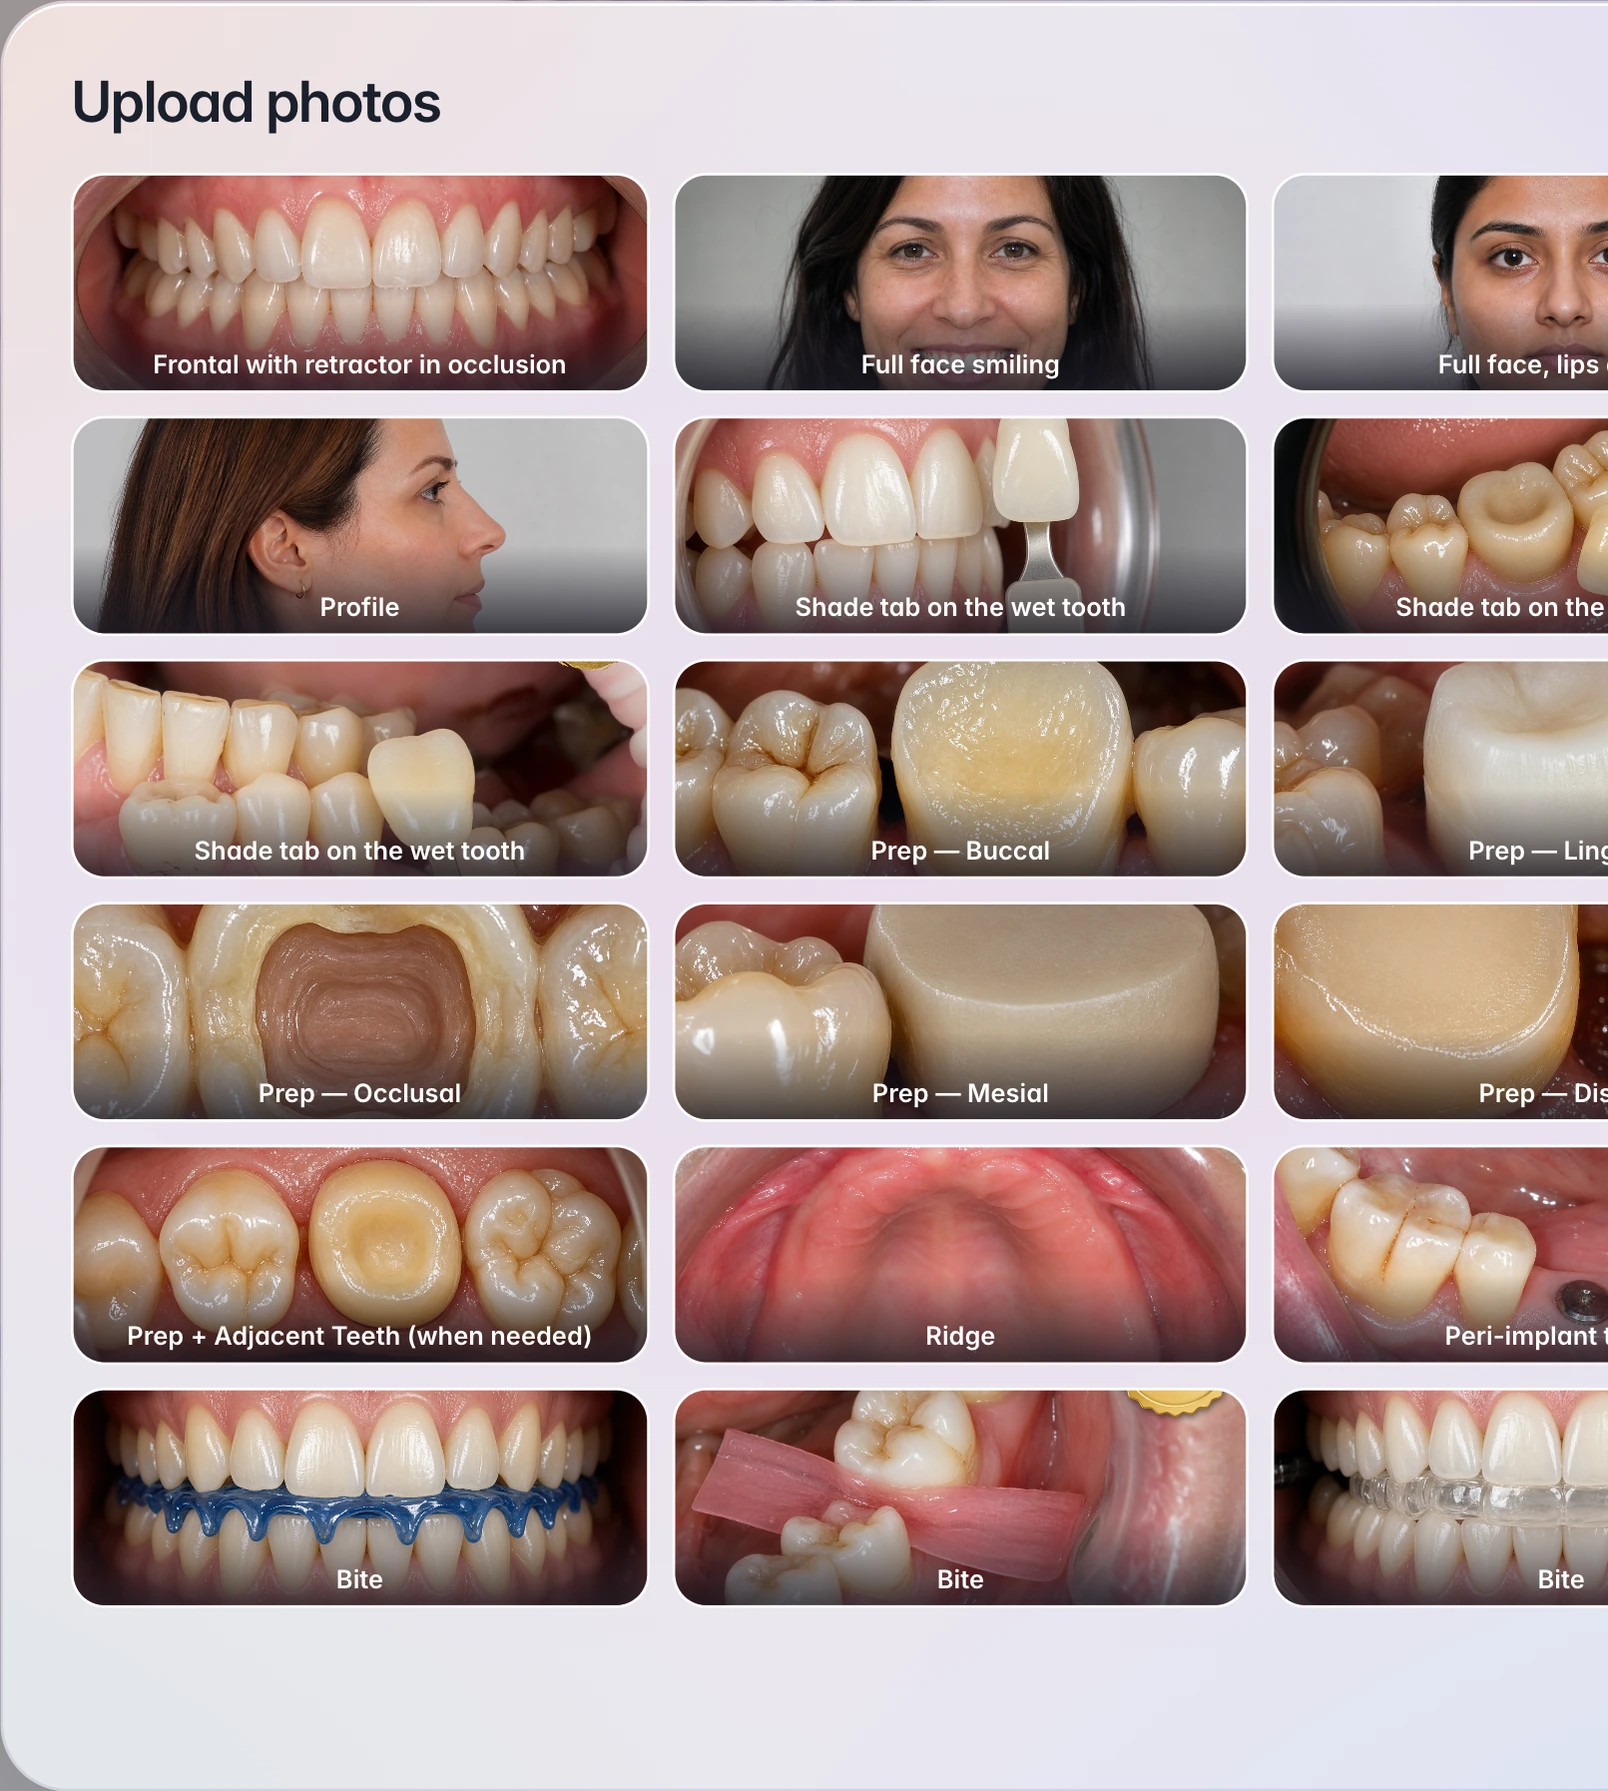
The photos travel with the case. In Clara's Digital Rx, the practice attaches them before creating the case.
Choose the photos together. Each one keeps its view from the file name, such as shade tab on the wet tooth.
The photos appear next to the Rx for 36, with shade A2 written. Check the attachments and click Create case.
Lab · Files & Photos
How the technician receives it.
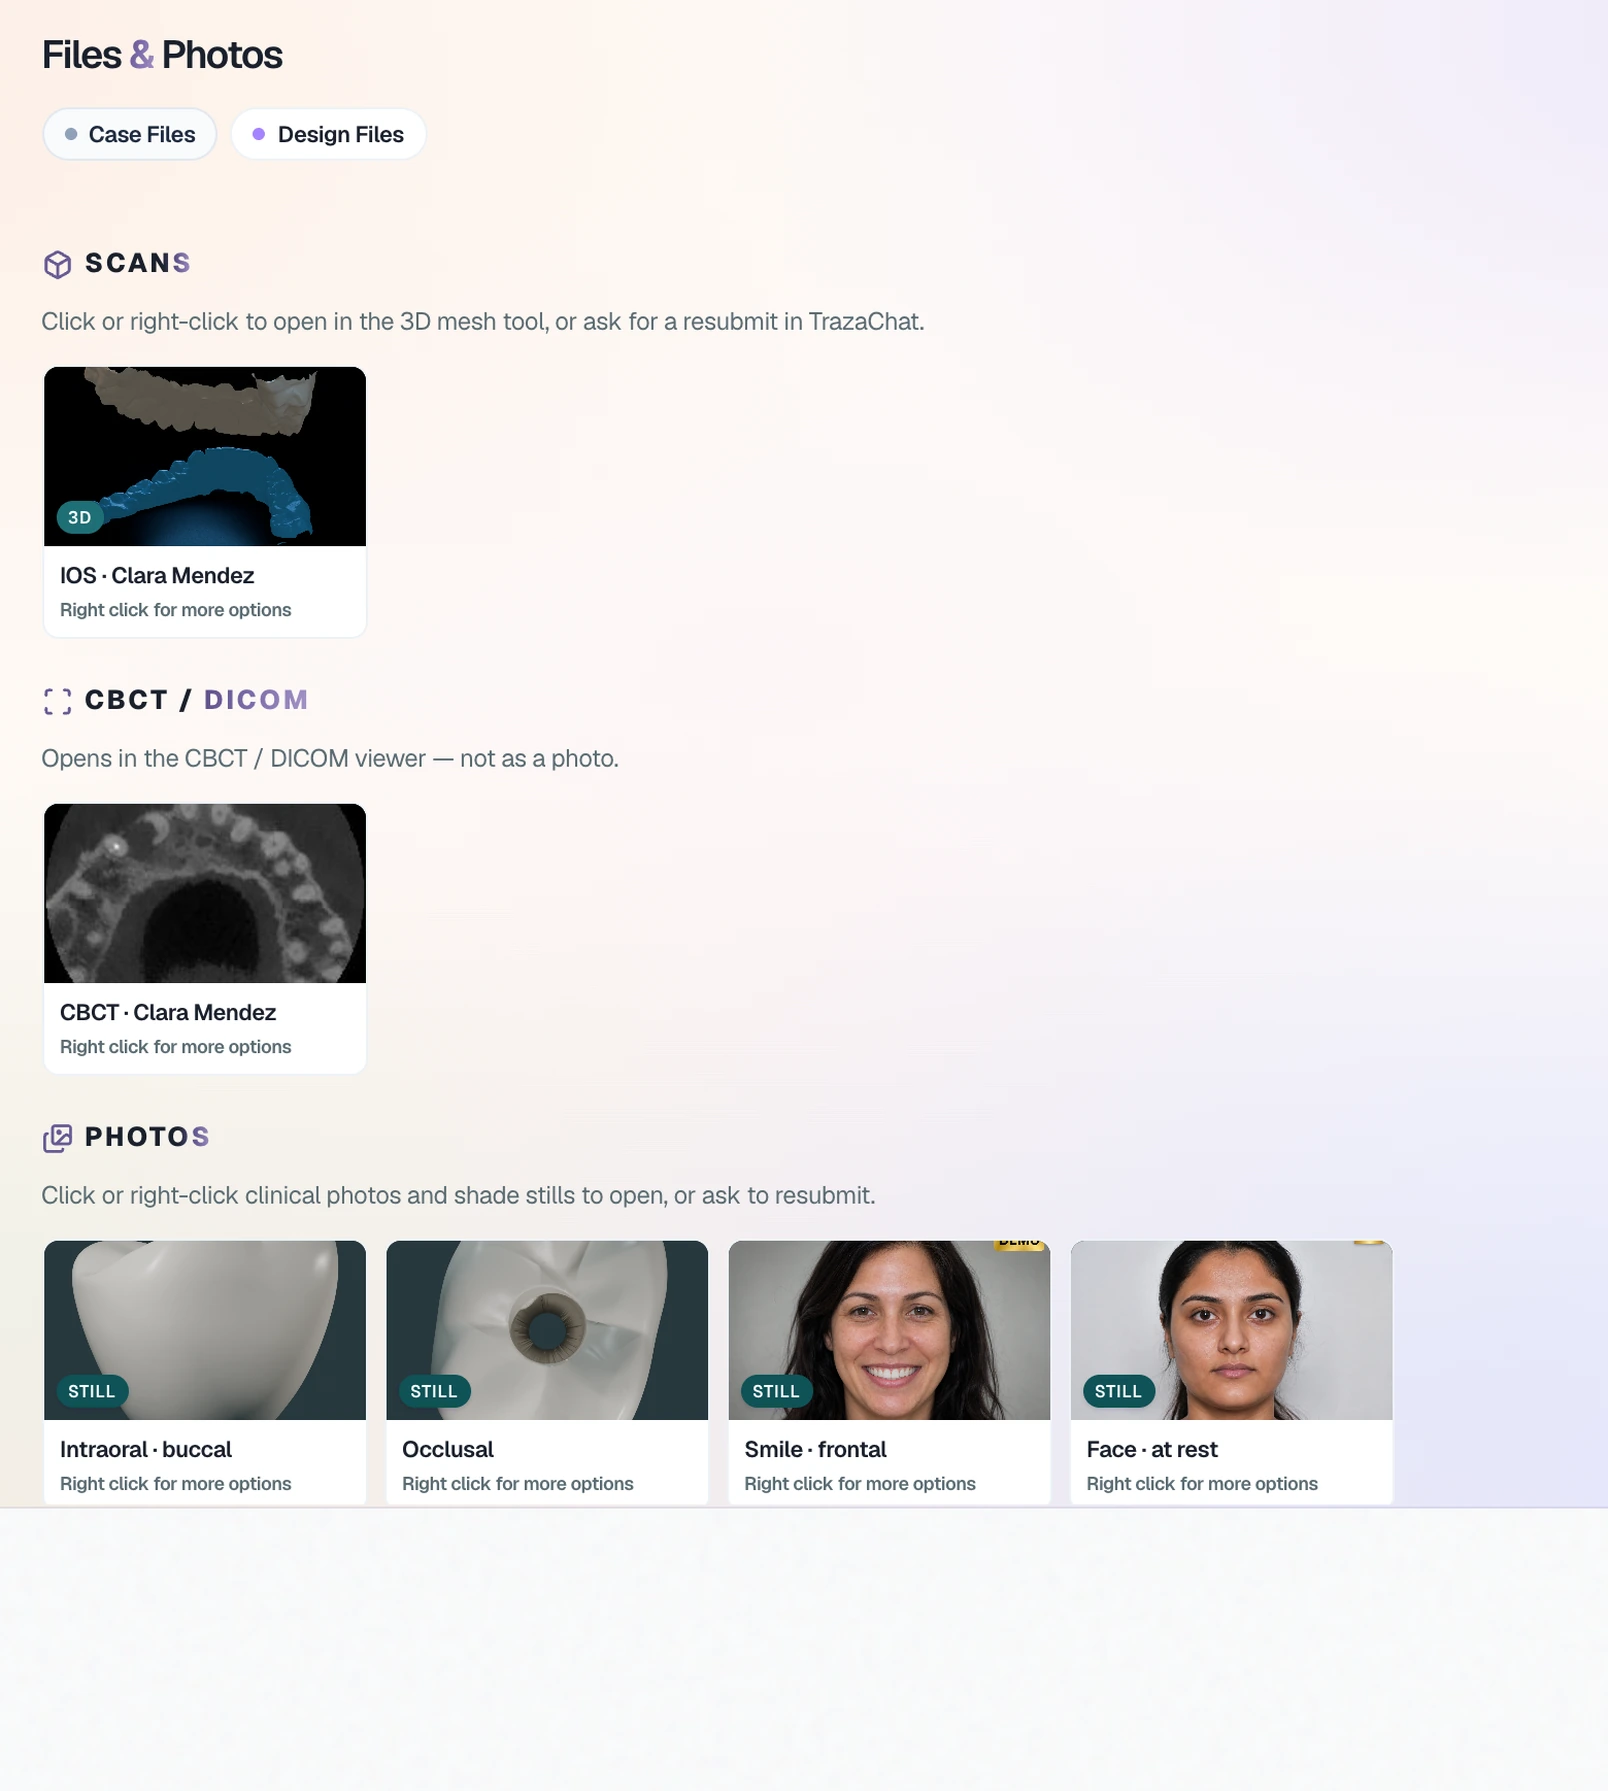
The technician opens Clara's case and finds the photos next to the scan. If they can't read the shade, they ask for another before fabricating.
On the Laboratory tab, Files & Photos shows the case's scan and its photos.
Right-click the file and choose Ask for resubmit to ask the practice on TrazaChat.
Questions
Before you send the photo.
The guide next to the tooth, at its level, with the shade label readable. Wet teeth, and light that doesn't tint the color. If the technician can't read the label, the photo is no use to them.
Write the shade on the Rx and send the photo too. The technician compares the photo with their guide before fabricating.
At the start of the appointment, before preparing the tooth. A tooth that dries out looks lighter, and the photo no longer shows its real color.
If you can, take one of each: the technician compares the two. Retake any with glare on the guide or the tooth.
The same one you write on the Rx, for example VITA classical. If you don't know which one the lab works with, ask before the first case.
In the Digital Rx, click Upload photos and choose them together. Each photo keeps its view from the file name. You decide the shade and write it on the Rx.
It stays in your browser: it isn't sent to TrazaLab and it's cleared when you reload. Print it or save it as a PDF.
Send your next crown with its shade photo.
Create your practice's account: the photo travels with the Rx and the lab receives it with the case.