
Re-tightening, as the manufacturer states it
Neodent states no re-tightening interval in the Grand Morse surgical and prosthetic manuals or catalogs we read.
IMPLANT TORQUE · NEODENT
One implant site. Five moments where a number decides whether the screw holds: placement, healing, abutment, prosthesis, re-tightening. Every value below is quoted from Neodent documentation, with the document named beside it.
Scale 0–70 Ncm. Select a component to move the pointer. Values beyond the scale sit at its end. EDITORIAL VISUALIZATION
“Maximum insertion torque: 60 Ncm … a value above 60 Ncm is contraindicated.” Motor step to a maximum of 32 Ncm at 30 rpm, then the torque wrench. Contra-angle implant driver: maximum 35 Ncm.
THE VALUES
Rows are grouped in treatment order. Where Neodent publishes a hand-tight instruction instead of a number, the row says so. Where nothing is published, the row says that too.
| Component | Applies to | Torque | From the document | Source |
|---|---|---|---|---|
| PlacementInsertion torque of the fixture | All GM implants — immediate loading ≥ 32; maximum 60 Driver: GM Implant Driver · Neo Torque Wrench | 32–60Ncm | “Maximum insertion torque: 60 Ncm … a value above 60 Ncm is contraindicated.” Motor step to a maximum of 32 Ncm at 30 rpm, then the torque wrench. Contra-angle implant driver: maximum 35 Ncm. | Neodent Grand Morse Surgical Manual (10135, © 2025)Manufacturer document |
| HealingHealing abutment · cover screw | GM healing abutment · cover screw Driver: Neo Screwdriver (manual, 104.060) | ≤ 10Ncm | “Use the manual Neo Screwdriver … Do not exceed the insertion torque of 10 Ncm.” | Neodent Grand Morse Catalog (CALIT.2005)Manufacturer document |
| AbutmentFinal abutment screw at implant level | GM Exact · Titanium Base · Universal · Pro PEEK · CoCr abutments Driver: Neo Screwdriver Torque Connection | 20Ncm | “Place the GM Exact Abutment (use the Neo Screwdriver Torque Connection with a torque of 20 Ncm).” The prosthetics manual also lists a 10 Ncm step for GM Exact without explanation; we read it as the prosthesis screw on the abutment and flag it, not state it. | Neodent Grand Morse Prosthetics Manual (10129, © 2024)Manufacturer document |
| AbutmentFinal abutment screw at implant level | GM Micro abutment (one-piece) Driver: Hexagonal Prosthetic Driver | 32Ncm | “Place the GM Micro Abutment, applying a torque of 32 Ncm, using the Hexagonal Prosthetic Driver.” | Neodent Grand Morse Prosthetics Manual (10129, © 2024)Manufacturer document |
| Multi-unitMulti-unit abutment into the implant | GM Mini Conical → implant: straight 32 · angled (17°/30°/45°/60°) 20 Driver: Hexagonal Prosthetic Driver (straight) · Neo Screwdriver (angled) | 32 · 20Ncm | Straight Mini Conical 32 Ncm with the hexagonal driver; GM Exact Mini Angled Conical 20 Ncm with the Neo Screwdriver. 45° only with Helix GM Long / Zygoma GM; 60° only with Zygoma GM. | Neodent Grand Morse Prosthetics Manual (10129, © 2024)Manufacturer document |
| Prosthetic screwScrew that holds the prosthesis on the abutment | Copings and definitive prostheses on Mini Conical / Micro Driver: Neo Torque Wrench | 10Ncm | “Place the definitive prostheses, using the Neo Torque Wrench with a torque of 10 Ncm.” Removable-prosthesis coping on Mini Conical: 15 Ncm. | Neodent Grand Morse Prosthetics Manual (10129, © 2024)Manufacturer document |
| TemporaryTemporary abutment or coping | GM Titanium Temporary Abutment · provisional Anatomic abutment Driver: Neo Screwdriver Torque Connection | 20Ncm | Provisional step “using the Neo Screwdriver Torque Connection with 20 Ncm torque”. | Neodent Grand Morse Prosthetics Manual (10129, © 2024)Manufacturer document |
Neodent states no re-tightening interval in the Grand Morse surgical and prosthetic manuals or catalogs we read.
Newest revision read: 2026. Manufacturers revise these documents; the revision printed on your IFU wins.
Values are quoted from manufacturer documentation and can change by component, platform and revision. Confirm the IFU for the component and lot in your hand before torquing.
WHY THE SCREW LOOSENS
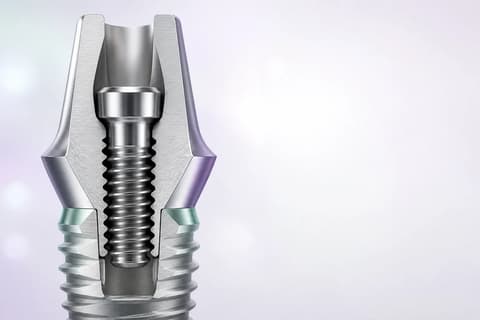
Torque creates preload — the clamping force that keeps abutment and implant pressed together. Microscopic peaks on the thread surfaces flatten under that load, and part of the preload is gone before the patient leaves the chair. The literature calls it the settling effect, or embedment relaxation.
Preload
ONE SITE, FIVE MOMENTS
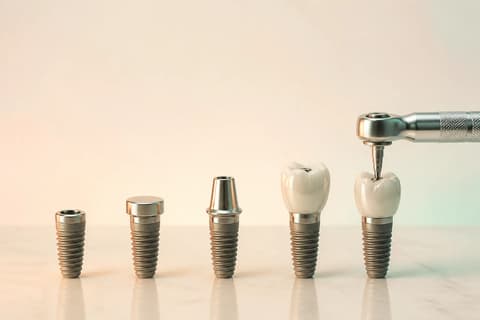
Site 36, one fixture, one crown. The same Neodent values from the table, placed on the moment each one is read off the wrench.
 EDITORIAL VISUALIZATION
All GM implants — immediate loading ≥ 32; maximum 60
GM healing abutment · cover screw
GM Exact · Titanium Base · Universal · Pro PEEK · CoCr abutments
Copings and definitive prostheses on Mini Conical / Micro
GM Exact · Titanium Base · Universal · Pro PEEK · CoCr abutments
Shown as the same value as the abutment row. Whether and when to re-tighten follows the manufacturer statement quoted in the values section.
AFTER THE CLICK
In TrazaLab the implant line on a tooth site keeps system, platform, connection, abutment and applied torque together. It travels into the Digital Rx and onto the laboratory’s per-tooth sheet. An unconfirmed torque is not blank — the laboratory sees it as a gap.
See the Digital RxOTHER SYSTEMS
Each page is built the same way: quoted values, the document beside them, and the gaps stated as gaps.
Final abutment · Conical Connection (CC) · Tri-channel (NobelReplace) · External hex (Brånemark)
Final abutment · CrossFit (BL/BLT) · TorcFit (BLX) · TLX NT/RT/WT
Final abutment · Grand Morse (GM) — one prosthetic platform for Helix, Drive, Titamax, Helix Long and Zygoma
Final abutment · Tapered Screw-Vent internal hex (TSV · TM · TSX) · 3i Certain internal · 3i External hex
Final abutment · Conical connection (C1 · V3) · Internal hex (Seven · M4) · Multi-Unit · CONNECT
Final abutment · TS internal conical hex — mini and regular platforms (TS II · TS III · TS IV)
Final abutment · Internal hex (Tapered Internal · Tapered Pro · Tapered Plus · 3.0 · Tissue Level) · Conical (Tapered Pro Conical)
Final abutment · AnyRidge internal conical · Blue Diamond conical · AnyOne External hex
Final abutment · ET / EK internal conical hex — mini and regular platforms · SS (Octa) · EM
QUESTIONS
Values are quoted from manufacturer documentation and can change by component, platform and revision. Confirm the IFU for the component and lot in your hand before torquing.
60 Ncm. The surgical manual states that a value above 60 Ncm is contraindicated, and places immediate loading between 32 and 60 Ncm. The motor step stops at 32 Ncm; the wrench finishes the seating.
The Grand Morse taper carries the retention. Two-piece abutments such as GM Exact tighten to 20 Ncm, prosthetic screws on Mini Conical and Micro abutments to 10 Ncm. Only the one-piece Micro and the straight Mini Conical go to 32 Ncm, with the hexagonal prosthetic driver. Cone Morse (CM) components are a different connection and are not covered on this page.
No. They are quoted from the manufacturer documents listed on this page, with the revision year noted. The IFU packed with your component and lot is the instruction; this page puts the values next to the treatment step and the case record.
The literature on the settling effect widely advocates a second application at the same value after about ten minutes, and in vitro work shows it partially restores preload. The evidence for a fixed interval is limited. The manufacturer statement for this system is quoted in the values section; where it says nothing, this page does not turn that silence into a rule.
In TrazaLab it is a field on the implant line of the tooth site, next to system, platform, connection and abutment. The Digital Rx carries it to the laboratory, whose per-tooth sheet prints the torque. If it was never confirmed, the packet shows “Not on Rx” instead of a number.
AFTER THE CLICK
TrazaLab records the implant line with its torque on the tooth site, writes it into the Digital Rx, and shows the laboratory exactly what was applied — or exactly what was not confirmed.