TrazaSonrisa design before you prep.
The only smile studio that works with the patient in the chair. Ten clinical guides, a dental library, and facial analysis on a single retractor photo — design, show the patient, export, and send to the lab before the first cut.
One retractor.
A full analysis.
A single retractor photo triggers the facial and dental analysis. Midline, symmetry, incisal edge, arch, and length — everything is measured before you decide a thing.
A smile isn't guessed.
It's designed.
The surgeon designs.
The lab executes.
The patient confirms.
One flow · One case
Ten guides.
Toggle them live.
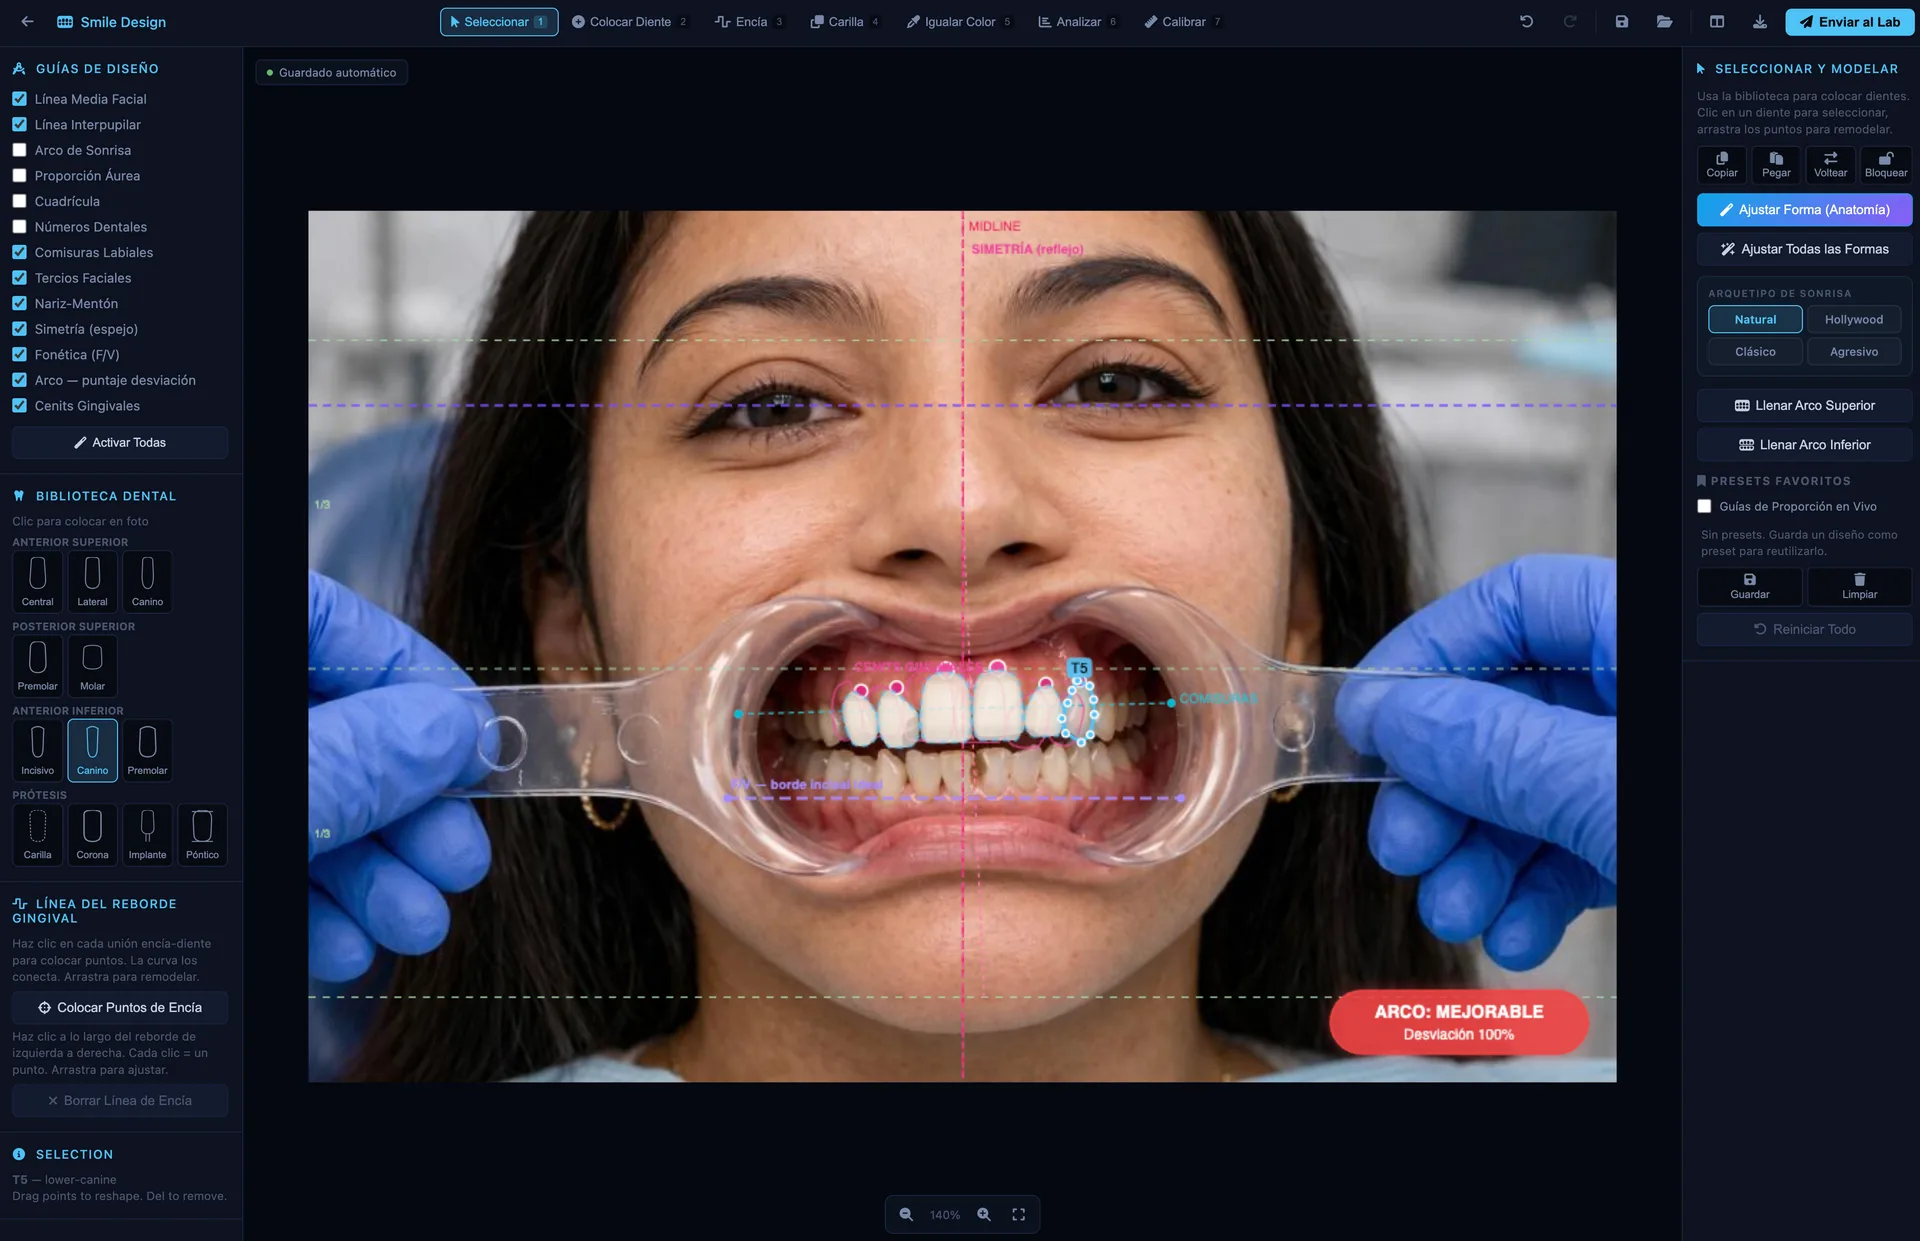
The same overlays you use chairside. Toggle any combination below and watch them draw on the real patient photo — no external software, no friction.
One canvas.
Everything you need on top.
Guides on the left. Shape library on the left. Modeling panel on the right. No nested menus. No friction between diagnosis and design.
Design guides
Ten clinical overlays — facial midline, golden ratio, facial thirds, lip contours — turned on with a tap and off with another. Invisible to the patient, obvious to you.
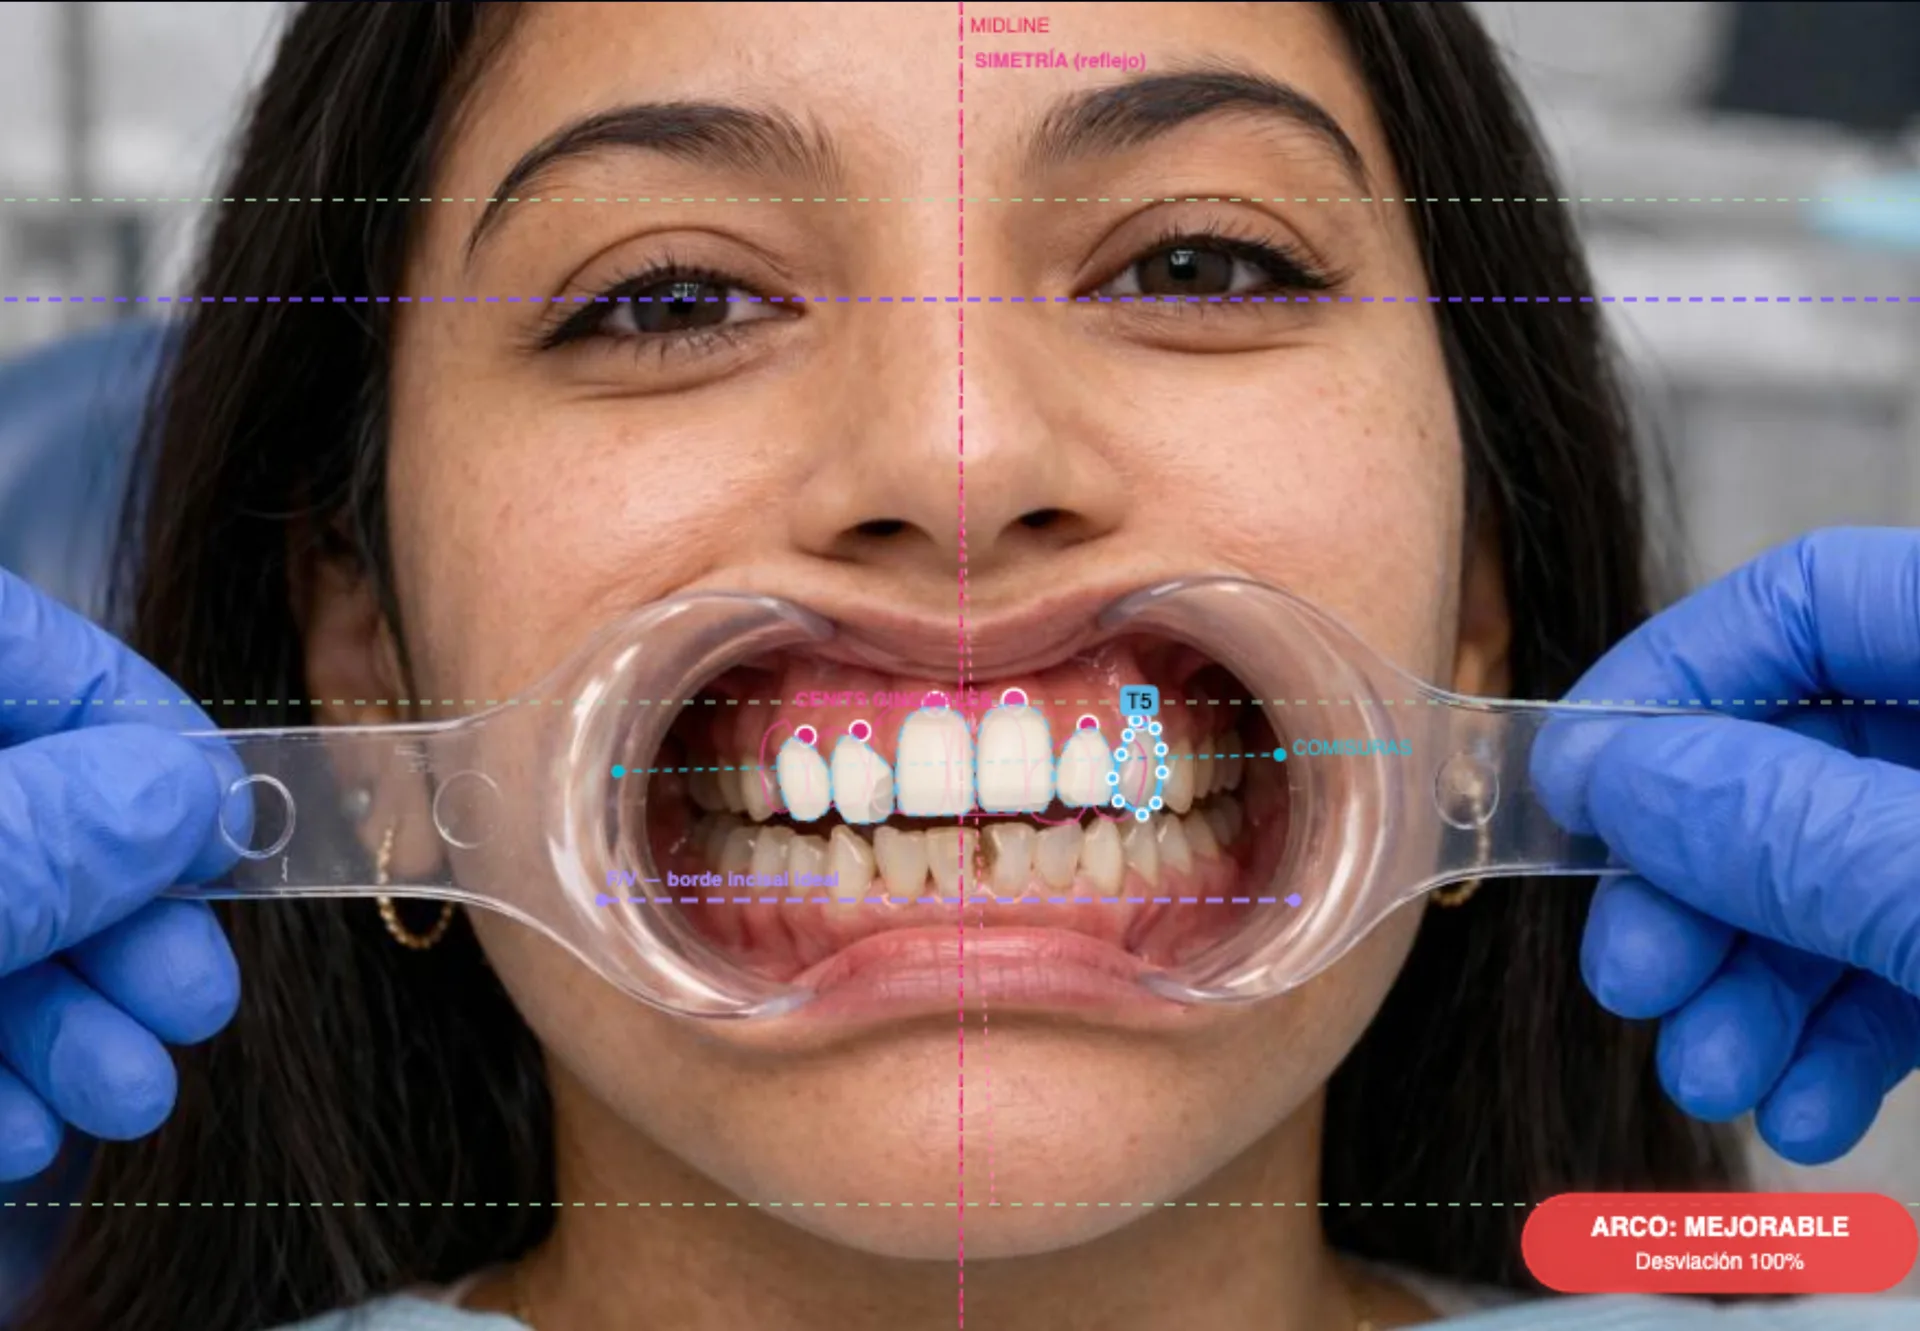
Incisal edge.
Gingival contour.
The two lines that hold up the architecture of a smile. They switch on as live overlays, draw on the real patient photo, and travel with the case all the way to the lab.
The curve the patient sees when smiling.
Sets the relative length of centrals, laterals, and canines. Aligned to the lower lip curvature — the foundation of every natural smile.
The line the patient doesn't see, but notices.
Zenith symmetry, parallel with the incisal line, gum exposure level. The difference between an acceptable smile and a harmonious one.
Together they define proportion, age, and character.
Turn on both, adjust over the photo, and instantly see whether the rehab respects anatomy — or whether crown lengthening is needed before designing.
Two lines worth a thousand words to the tech.
They export inside the case — the lab sees exactly where the incisal edge and gingival contour you planned are. No interpretation, no errors.
Adjust. Move.
Align.
The right panel is not CAD software. It's a toolkit built for a surgeon with the patient in the chair — not for a tech in an office. Six actions that cover 95% of clinical adjustments.
Adjust shape (dynamic).
Change proportion, height, and width of a single tooth or the whole group. Changes show live on the photo — the patient approves the proportion before you touch the bur.
Drag · RescaleMove tooth.
Reposition individual teeth or entire arches. Useful for correcting tilts, diastemas, and asymmetric alignments before prescribing prior orthodontics.
Click · DragEdit contour.
Fine-tune the edges of a proposal. Smooth rough spots, round corners, adjust the embrasure between teeth. Your clinical judgment, reflected in every stroke.
Brush · EraserAlign upper arch.
Align the entire upper arch to a reference curve (flat, convex, pronounced). One click to correct the curve of Spee or curve of Wilson to ideal proportion.
One tapAlign lower arch.
The lower arch aligns just like the upper — just as easy, just as fast. Particularly useful when designing full-arch rehabilitations.
One tapPlace anchor point.
Mark the anatomical reference the tech needs — midline, canine tip, facial midline. The lab gets your anchor, not an approximation.
Click · PlaceSix shapes.
The smile you picture.
Every family is built from real proportions and clinical measurements. Try one, swap it, mix them — until you land on the one that belongs.
Natural
Soft golden ratio, organic symmetry. The foundation of any rehab designed to go unnoticed — the patient's best version, without looking like a dentist stepped in.
Refined
Elongated incisors, sharp lines, soft angles. For classic profiles and long faces that call for a smile proportional to the lower third — elegant but understated.
Hollywood
Total symmetry, flat edges, maximum brightness. For patients who want presence — actors, hosts, public figures. The smile you notice when someone walks into a room.
Rounded
Warm angles, soft edges, organic transitions. Ideal for oval faces and feminine smiles. Projects friendliness and approachability even at rest.
Square
Pronounced proportions, right angles, defined gum presence. For patients who don't want to look younger — they want to look like themselves, just better rehabbed.
Triangular
Strong directionality, prominent canines, slightly triangular incisal line. A smile of action — athletes, movement professionals, physical leadership. Projects energy even at rest.
Six personalities.
A smile that belongs.
Beyond dental morphology, every smile projects a character — an energy the patient recognizes as their own. Pick the archetype that connects with them, then the shape that embodies it. The design stops being technical and starts being human.
Natural
Golden ratio, soft symmetry, slightly rounded edges. The foundation of every rehab designed to go unnoticed — the patient's best version, without looking like a dentist stepped in.
Hollywood
Total symmetry, flat edges, maximum brightness. For patients who want presence — actors, hosts, public figures. The smile you notice when someone walks into a room.
Youth
Elongated incisors, sharp edges at the tips, high brightness. A smile that turns back the clock. Ideal for aesthetic rehabs in older adults — brings back the energy of a young smile.
Mature
Pronounced proportions, right angles, defined gum presence. For patients who don't want to look younger — they want to look like themselves, just better rehabbed.
Vogue
Curved lines, soft edges, elongated-rounded proportion. The editorial smile — elegant, discreet, refined. Needs fine skin and a harmonious face to shine effortlessly.
Athletic
Strong directionality, prominent canines, slightly triangular incisal line. A smile of action — athletes, movement professionals, physical leadership. Projects energy even at rest.
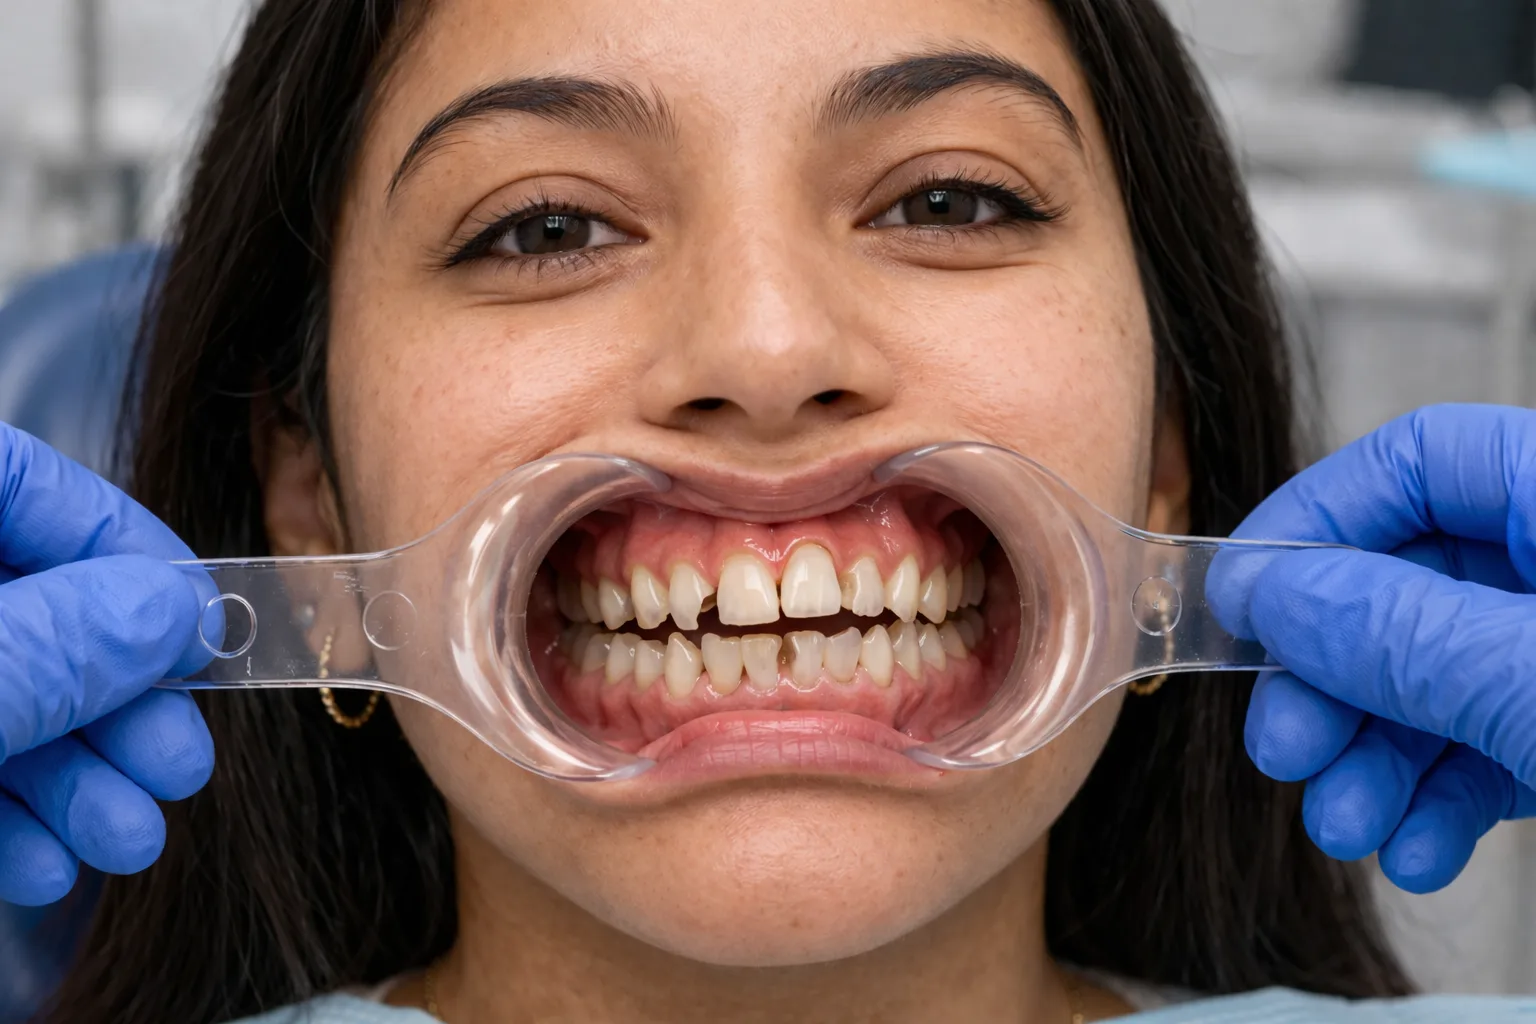
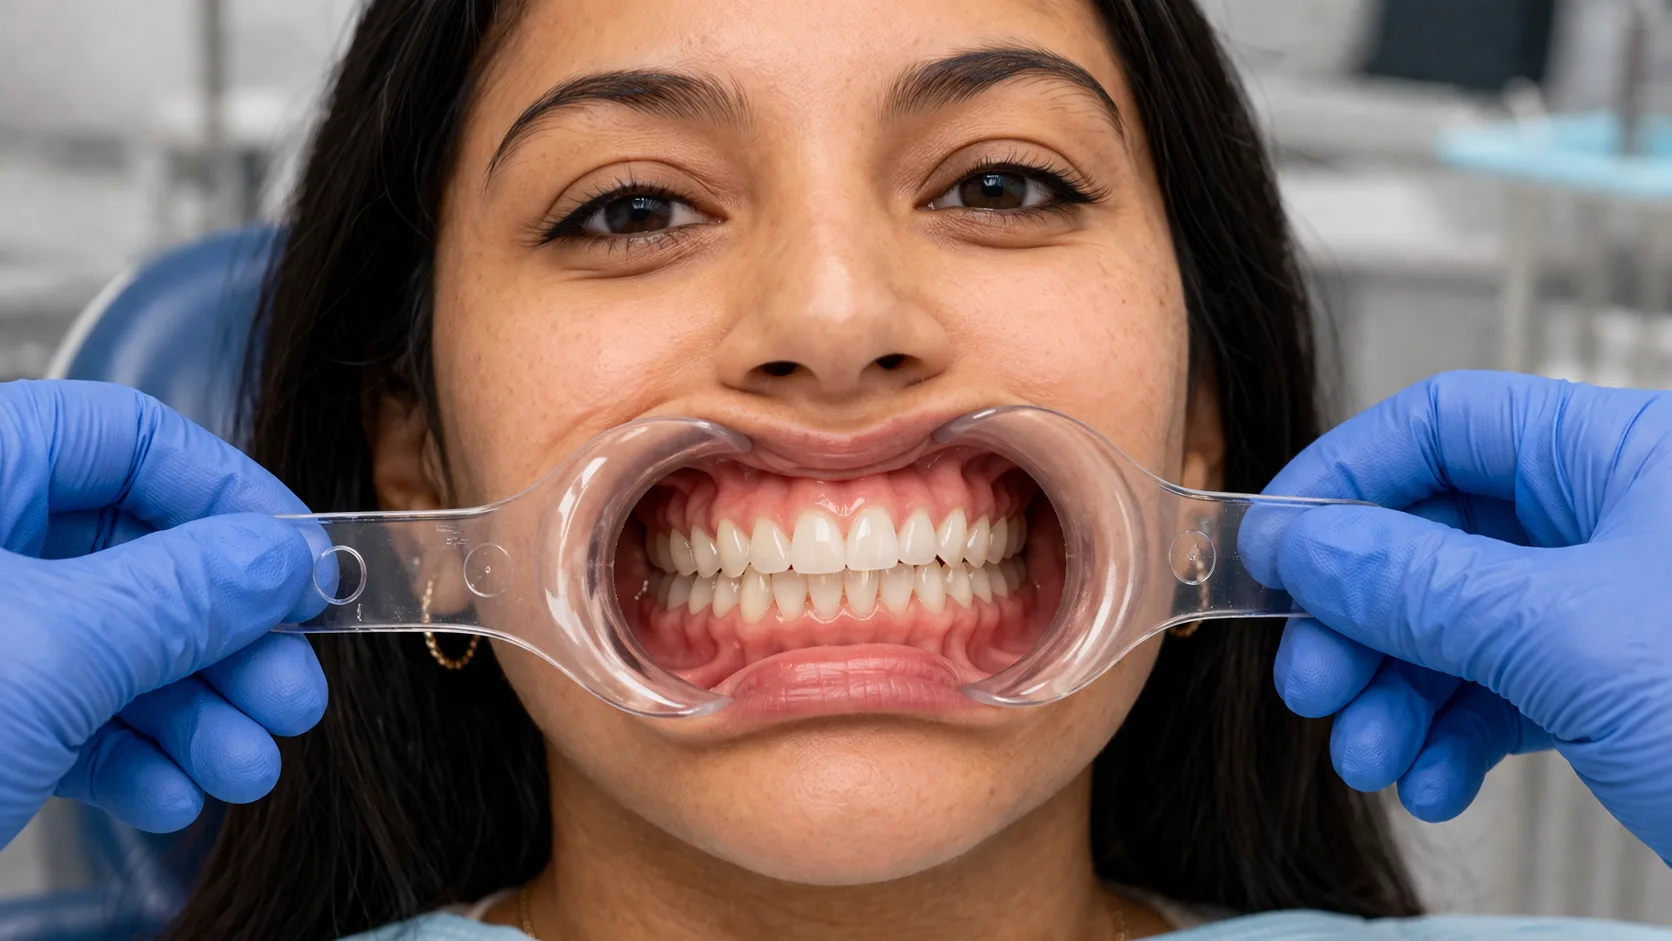
The before. The after.
On the same retractor shot.
Drag to compare. Show your patient what you're going to deliver — before signing the treatment plan.
 Before
Designed
Before
Designed
Five steps.
From chair to lab.
Each step takes seconds. The patient approves the design in the same visit. The lab starts before they leave the chair.
Retractor.
A single retractor photo from TrazaCaptura. The phone camera is enough — no intraoral scanner, no photo setup. The smile enters the system before you finish explaining the plan.
Calibration.
Two clicks: midline and a scale reference. From there, every measurement is in real proportion — the system adapts to the patient's anatomy, not the other way around.
Analysis.
Ten clinical guides activate on the photo — midline, golden ratio, thirds, incisal edge, gingival contour. The diagnosis appears before the patient even settles in.
Design.
You pick the dental library, adjust the shape, set the archetype. Everything on the real photo, in real proportion. The patient sees every change instantly — and tells you which one they like.
Send to Lab.
The case goes out with everything inside — photo, active guides, selected shape, shade, notes. The lab starts working before the patient leaves the office. Zero emails. Zero WhatsApp.
No one else does it
chairside.
We reviewed 32 smile-design tools — Medit Smile Design, 3Shape Smile Design, Exocad SmileCreator, DSD App, Smilefy, Kois, SmileCloud, among others. None of them let you design with the patient in the chair, show live before/after, export and share — and hand the case off to the lab in one flow.
Design with the patient watching.
Open the studio on a tablet or monitor. The patient watches you move the incisal edge, adjust the midline, pick the smile shape. They're part of the decision — they confirm before you ever touch a bur.
- Tablet · monitor · large screen
- Zero friction with the patient
- Informed decision before you prep
Before / After instantly.
Built-in side-by-side comparator. One button, and the patient sees their current smile and the one you designed — slide, compare, pick. The conversation about the rehab changes forever.
- Interactive split slider
- Zoom · pan · zone-by-zone compare
- Patient says "yes" before signing
Export, share, archive.
PDF report with guides and measurements. Comparison JPG ready for social. Shareable link for undecided patients. Send by WhatsApp, email, or patient portal — the surgeon controls the channel.
- PDF · JPG · shareable link
- WhatsApp · email · portal
- Permanently saved per case
From design to case.
One button and the lab gets the complete package — photo with active guides, chosen smile shape, shade if you used TrazaTono, surgeon notes. No emails. No WhatsApp. No re-sending cropped files.
- Full case, one click
- Embedded Rx
- Lab starts sooner
Try TrazaSonrisa in your next visit.
Full access during the pilot. No card. No commitment. If it changes your flow with the patient, you'll know in the first week.
Connected to the
rest of the practice.
TrazaSonrisa doesn't live alone. It shares cases with TrazaCaptura, shade with TrazaTono, and delivers the Rx to the lab inside the same system.
The essentials,
no ornament.
Questions we already asked you.
Design the smile
you picture.
Ten guides, six shapes, one retractor. From the first click to the lab, with no external software, no emails, no assumptions.